DIY Gift Basket Under $20

When it comes to holiday gifts, you can never go wrong with a basket of treats! Keep reading to learn how to put this beautiful gift basket together for under $20!
Disclosure: Some of the links below are affiliate links. If you click through and decide to make a purchase, I will earn a commission at no additional cost to you.
SUPPLIES

WHAT YOU NEED:
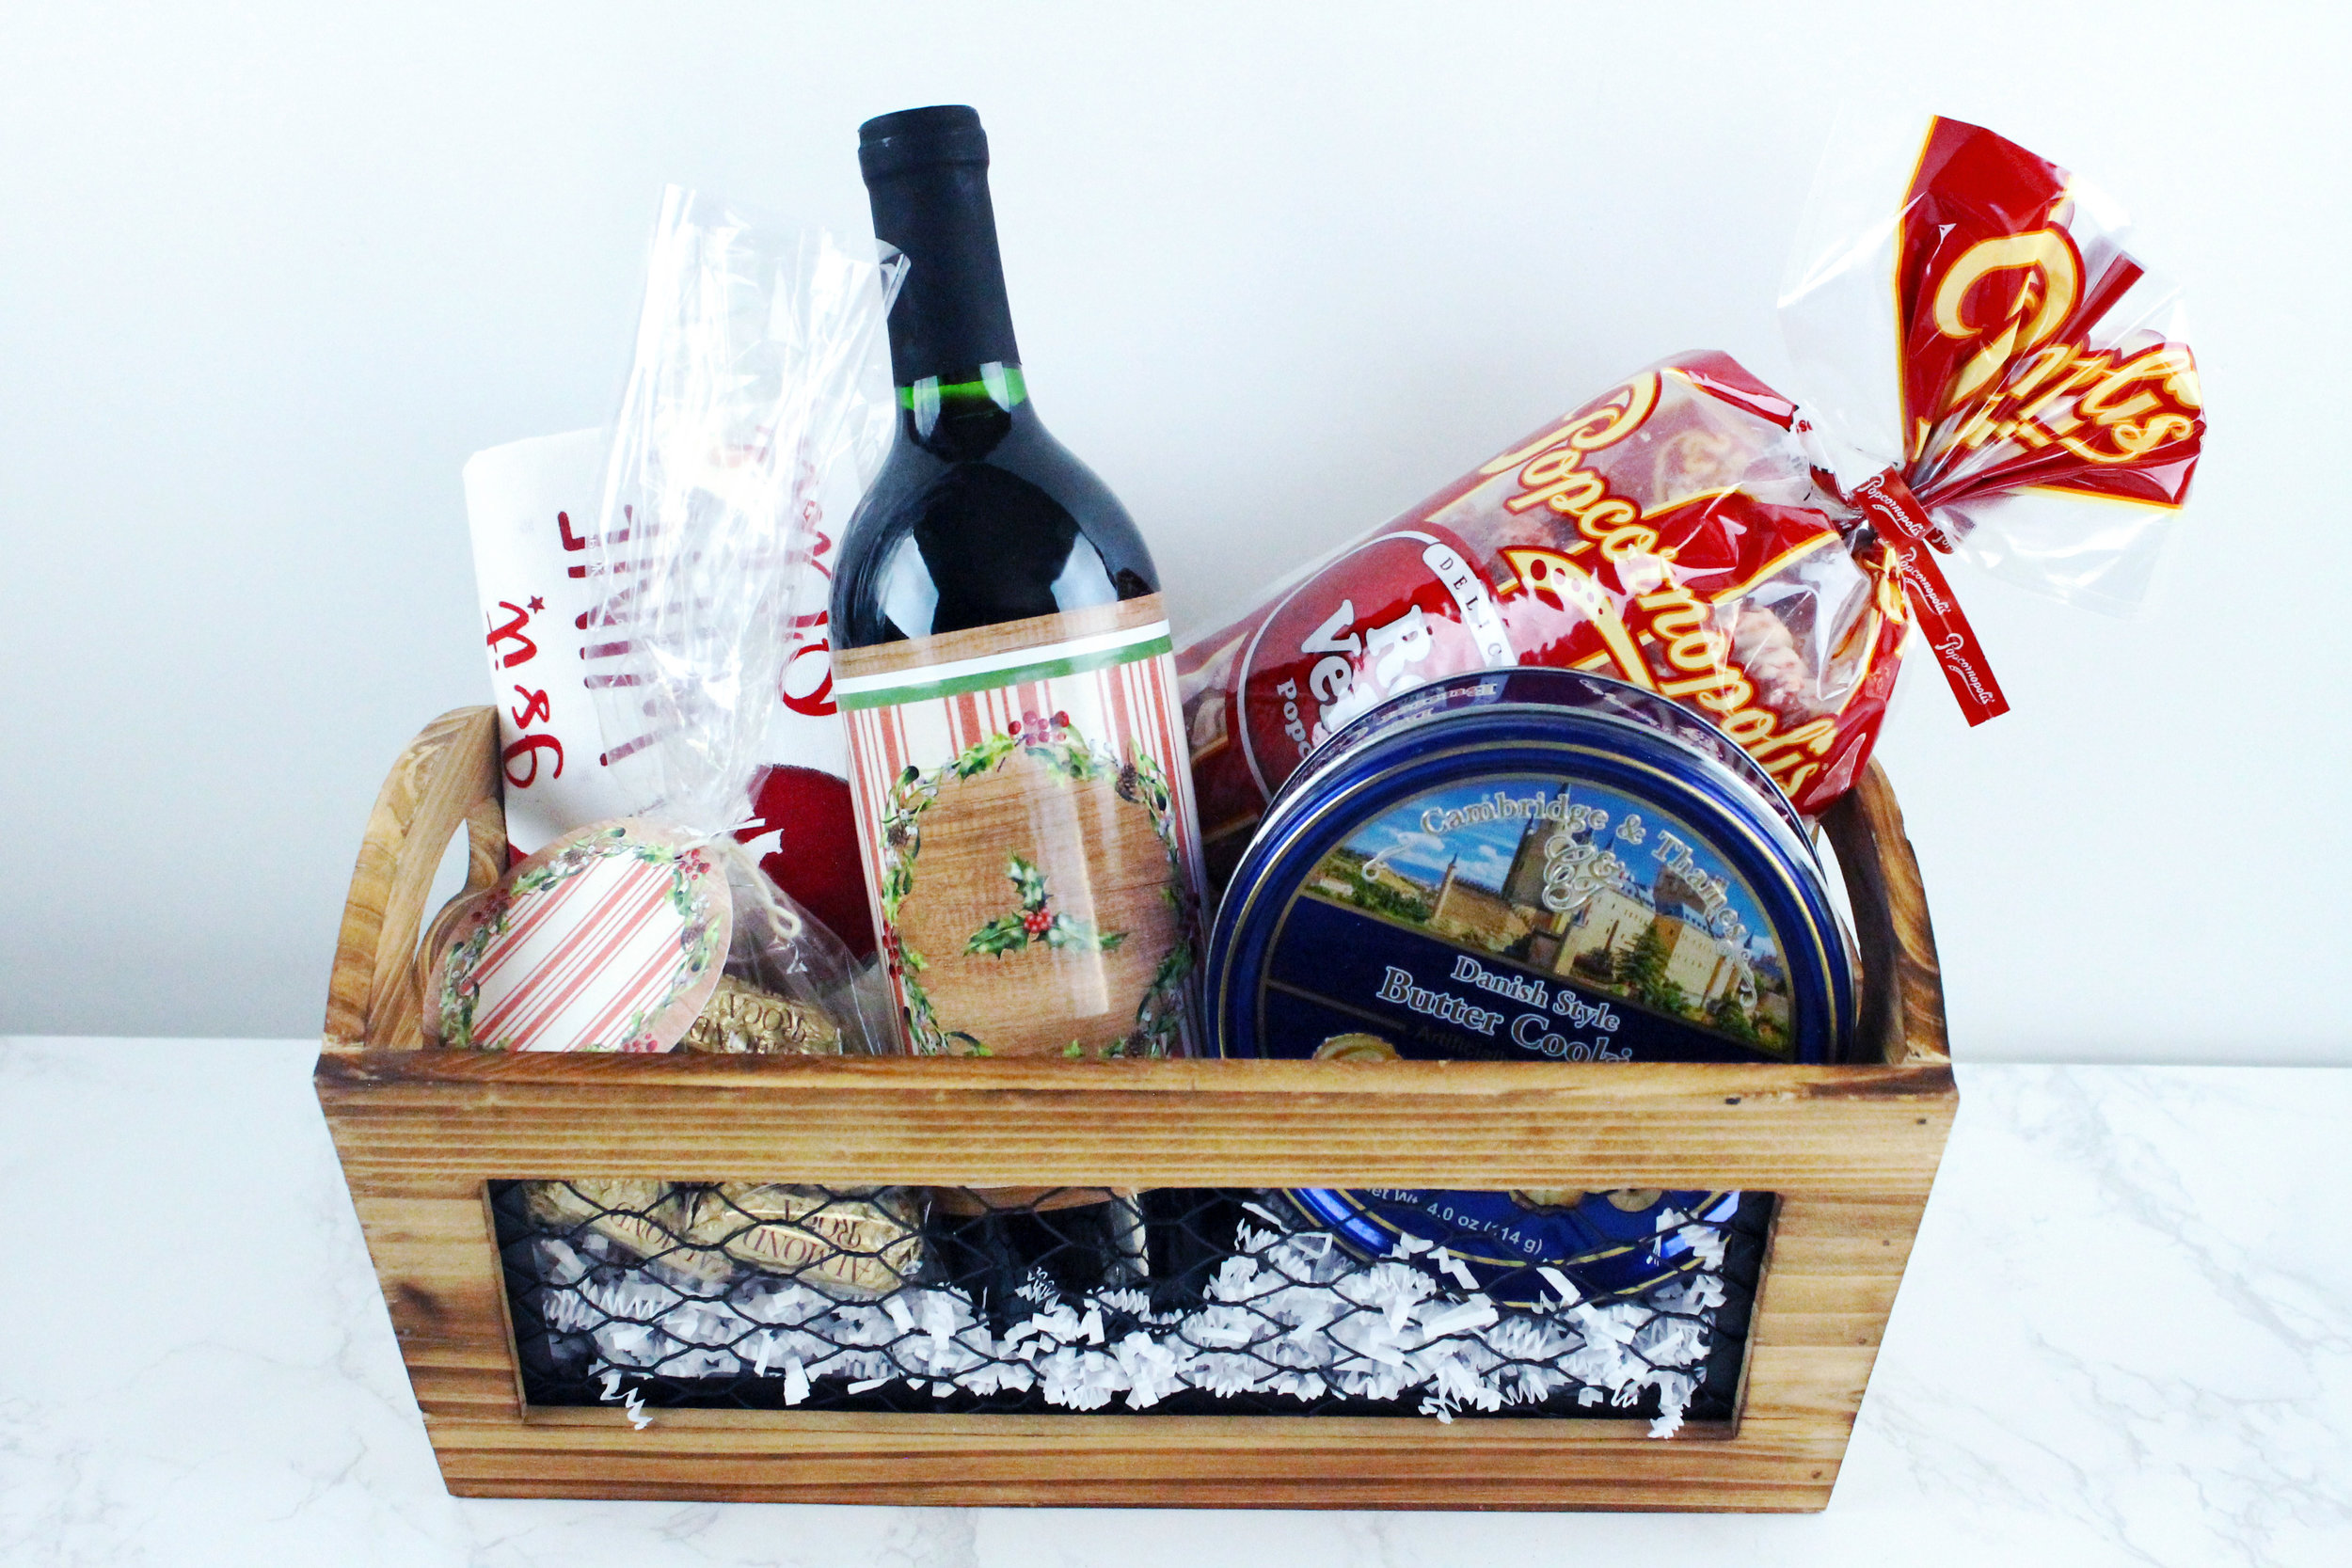
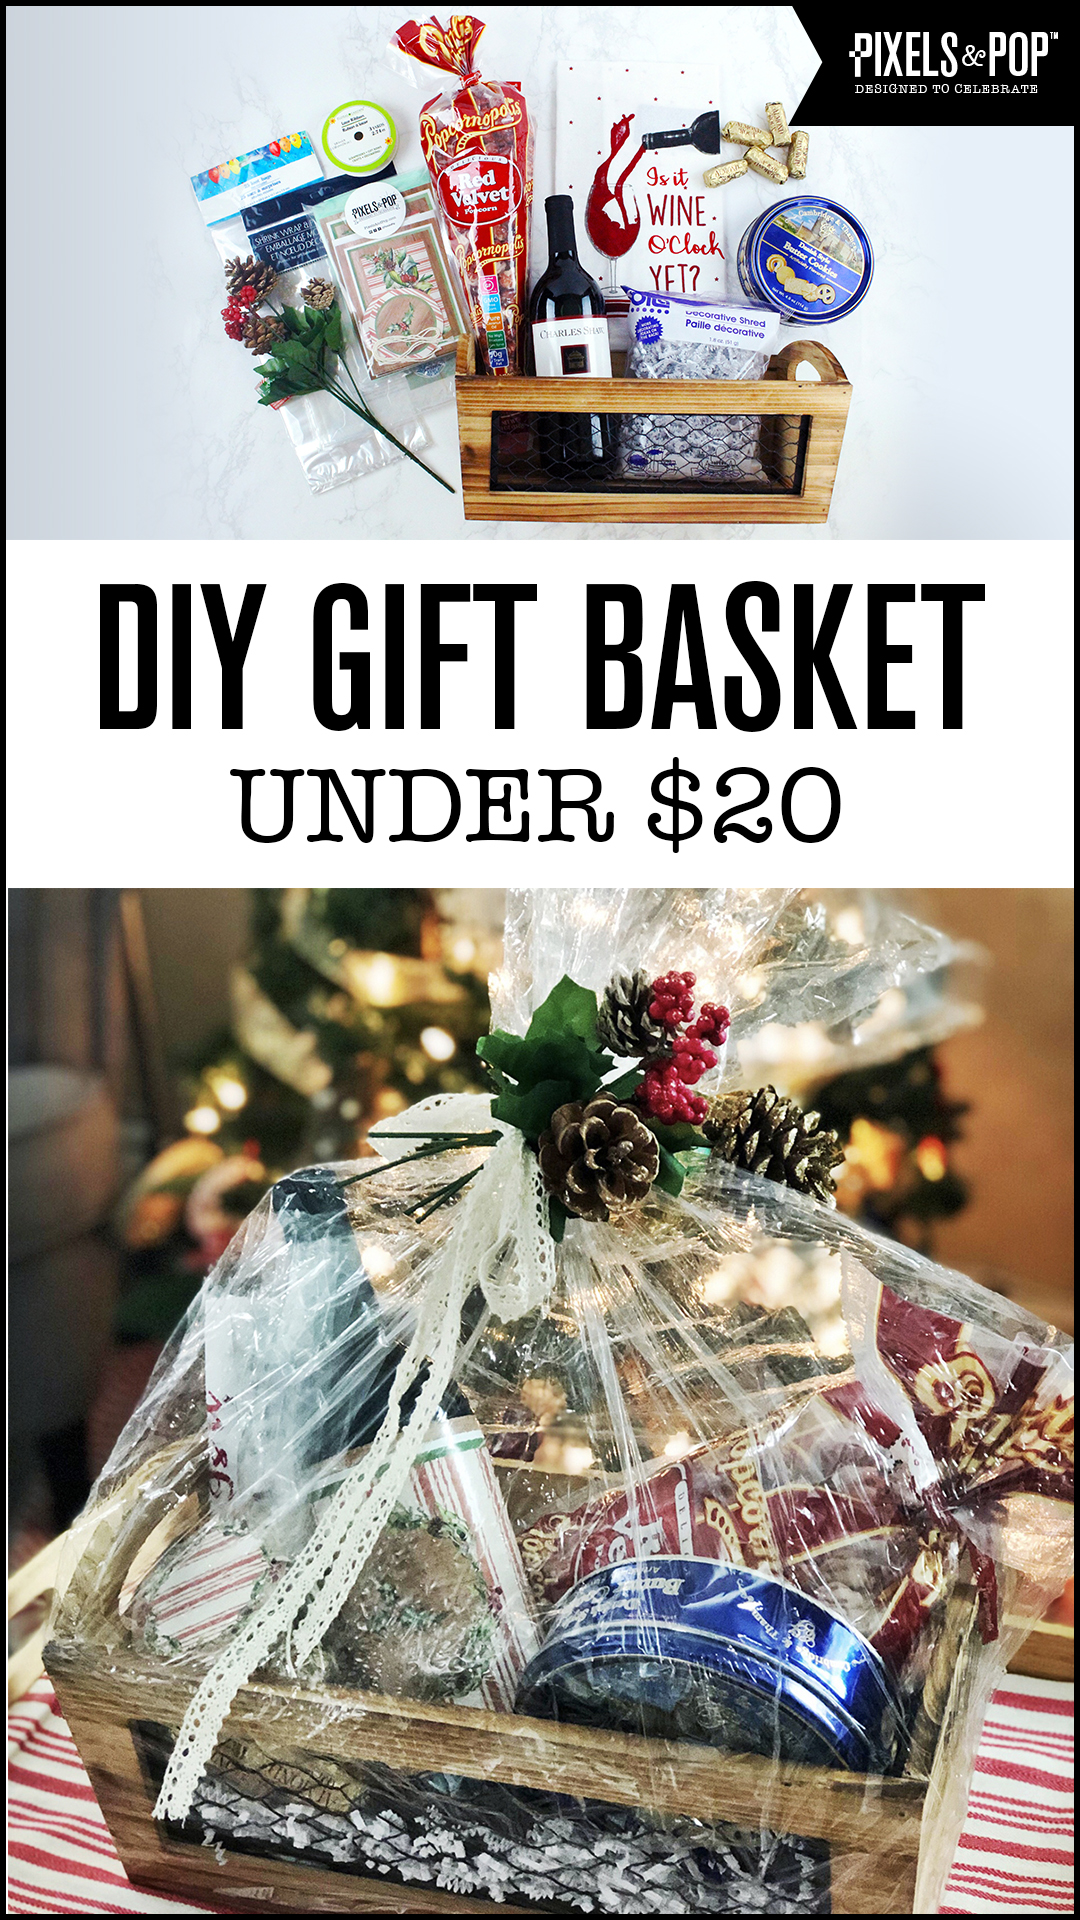
✔ Basket - I just used a 12.5” x 5.5” x 6” wooden basket I had at home but here are 2 great options for only $1 each: Silver or Gold Plastic Basket, White or Black Wire Basket
✔ Rustic Christmas Gift Wrap Kit
✔ White Paper Shreds
✔ Gift Basket Shrink Wrap
✔ Clear Cellophane Treat Bags
✔ Lace Ribbon
✔ Bottle of wine or sparkling apple cider - We used a bottle of Charles Shaw from Trader Joes
✔ Flavored Popcorn
✔ Almond Rocca
✔ “It’s Wine O’Clock” Flour Sack Towel
✔ Danish Style Butter Cookies
✔ Pine Cone & Holly Stems
STEP 1

Empty your bag of paper shreds into the bottom of your basket and evenly spread them out. These will help cushion and elevate the goodies you place in the basket.
STEP 2

Use one of the gift stickers from the Rustic Christmas Gift Wrap Kit to decorate your bottle of wine!
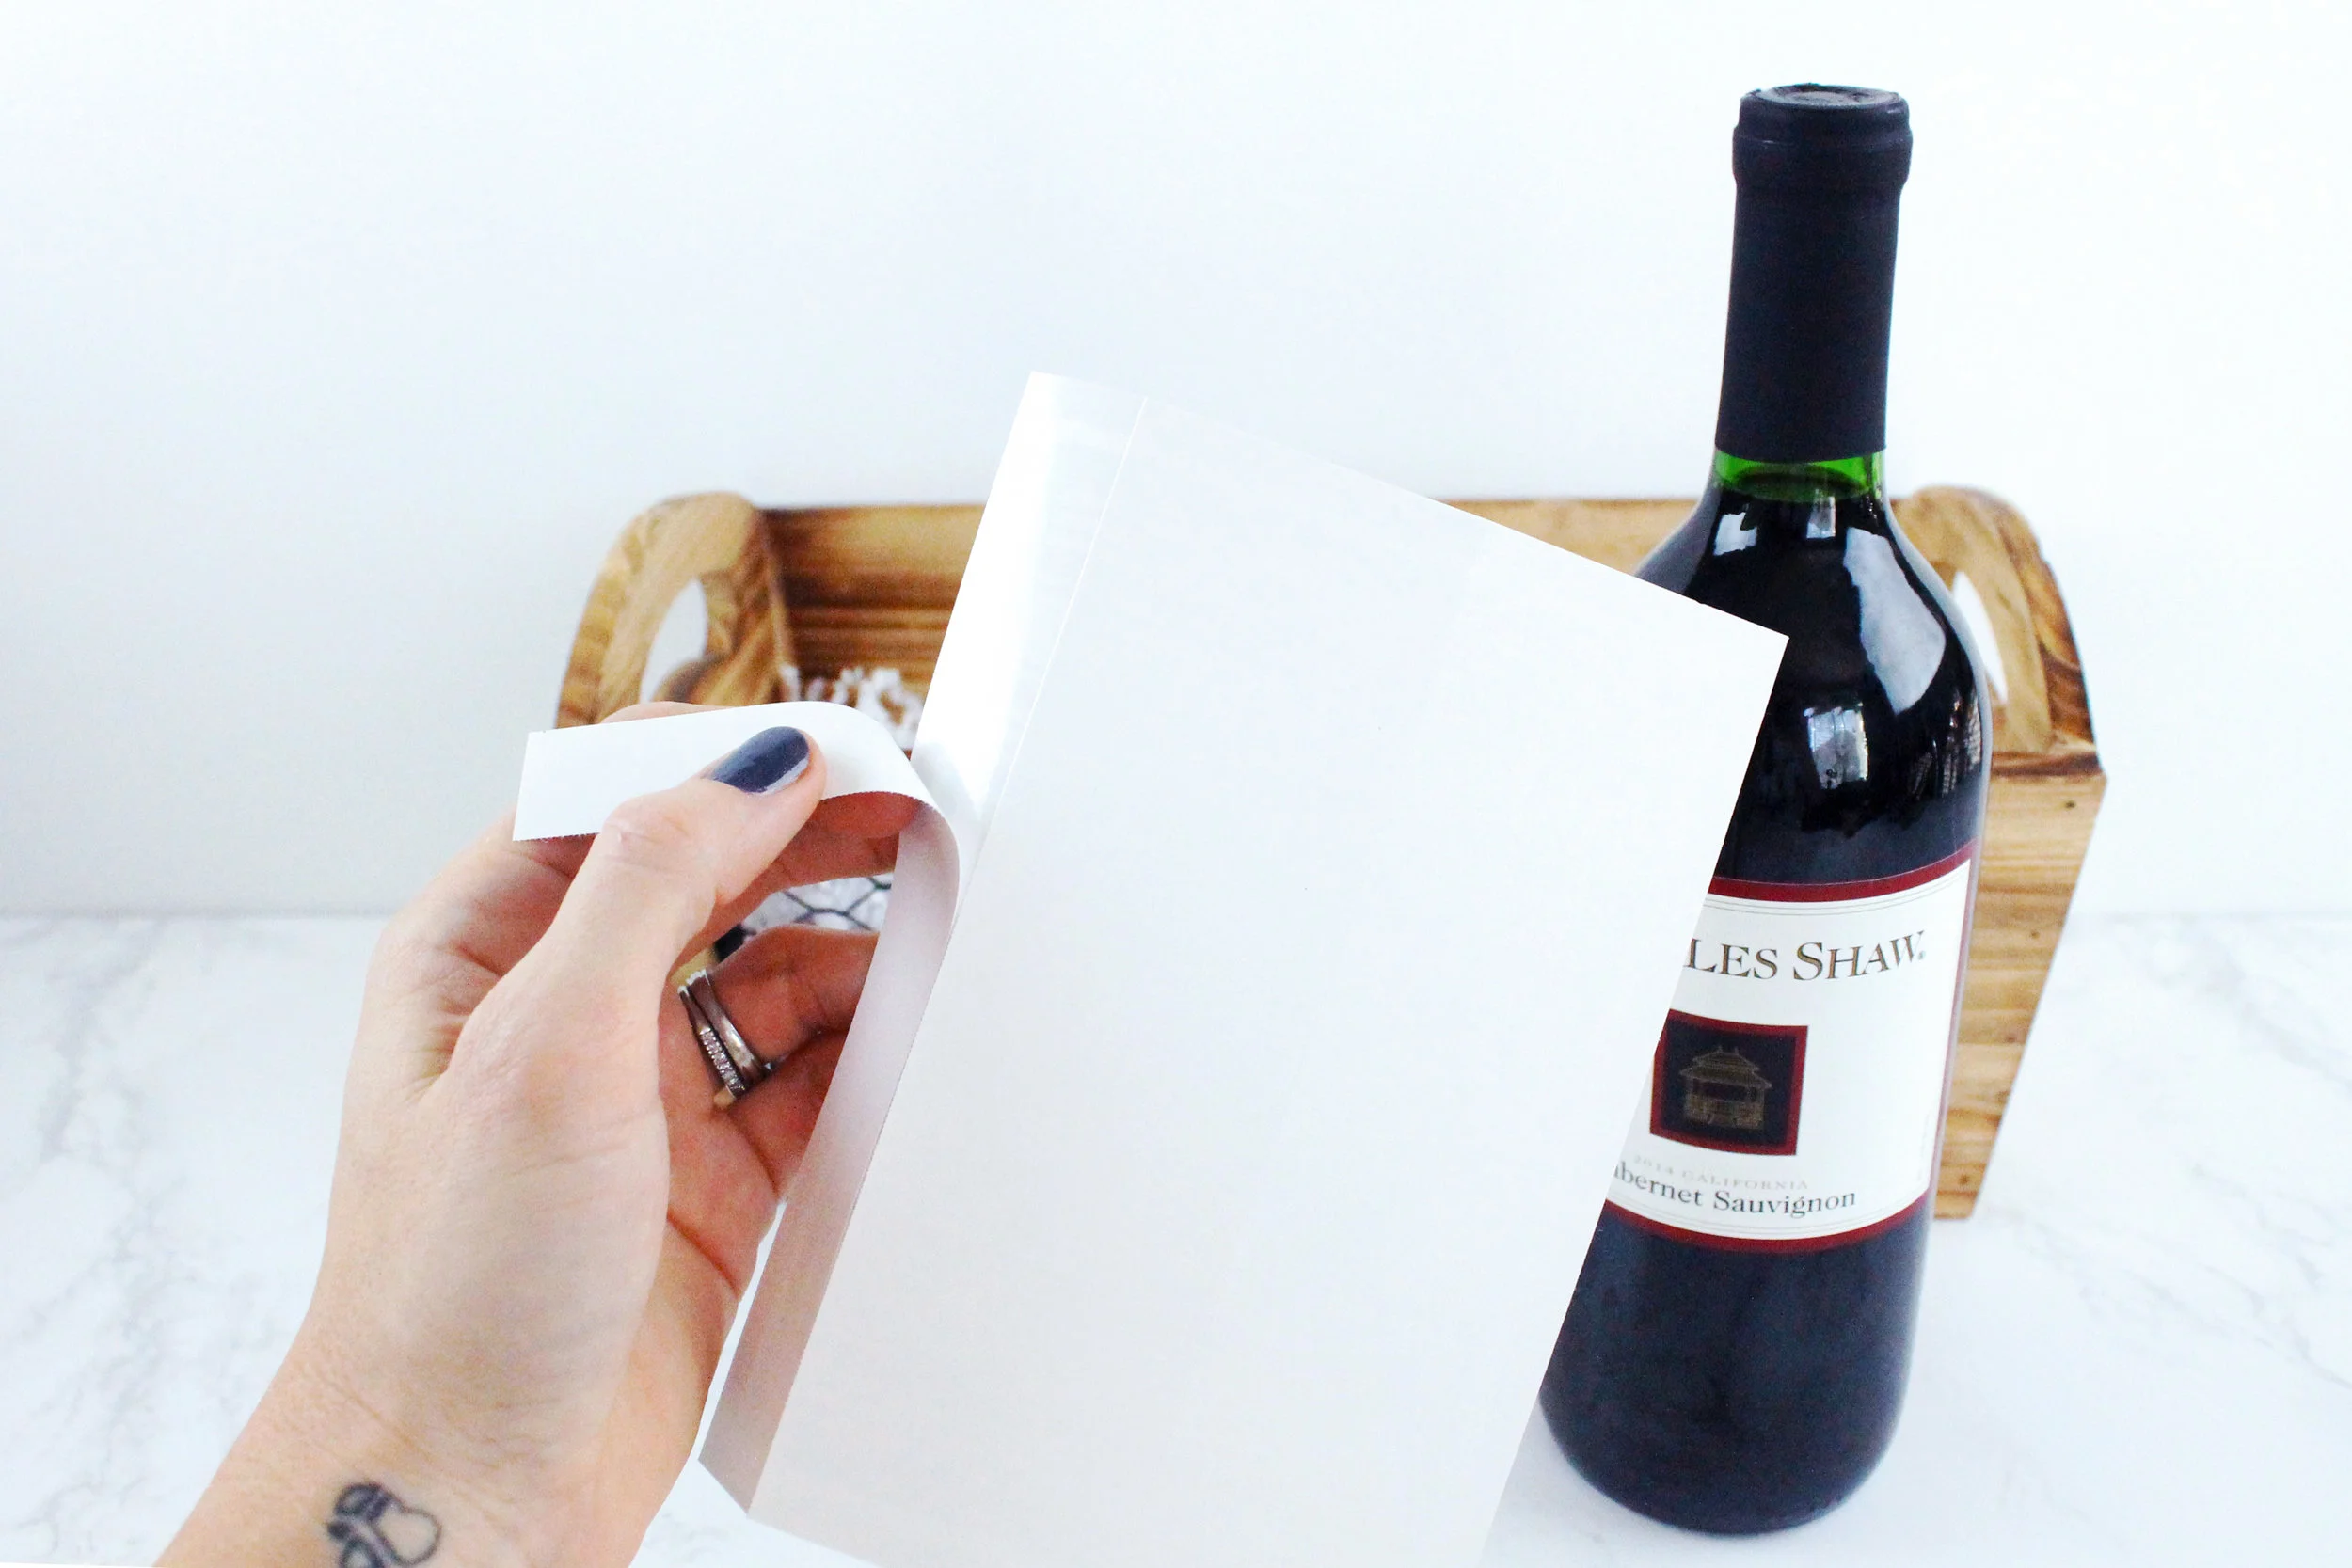
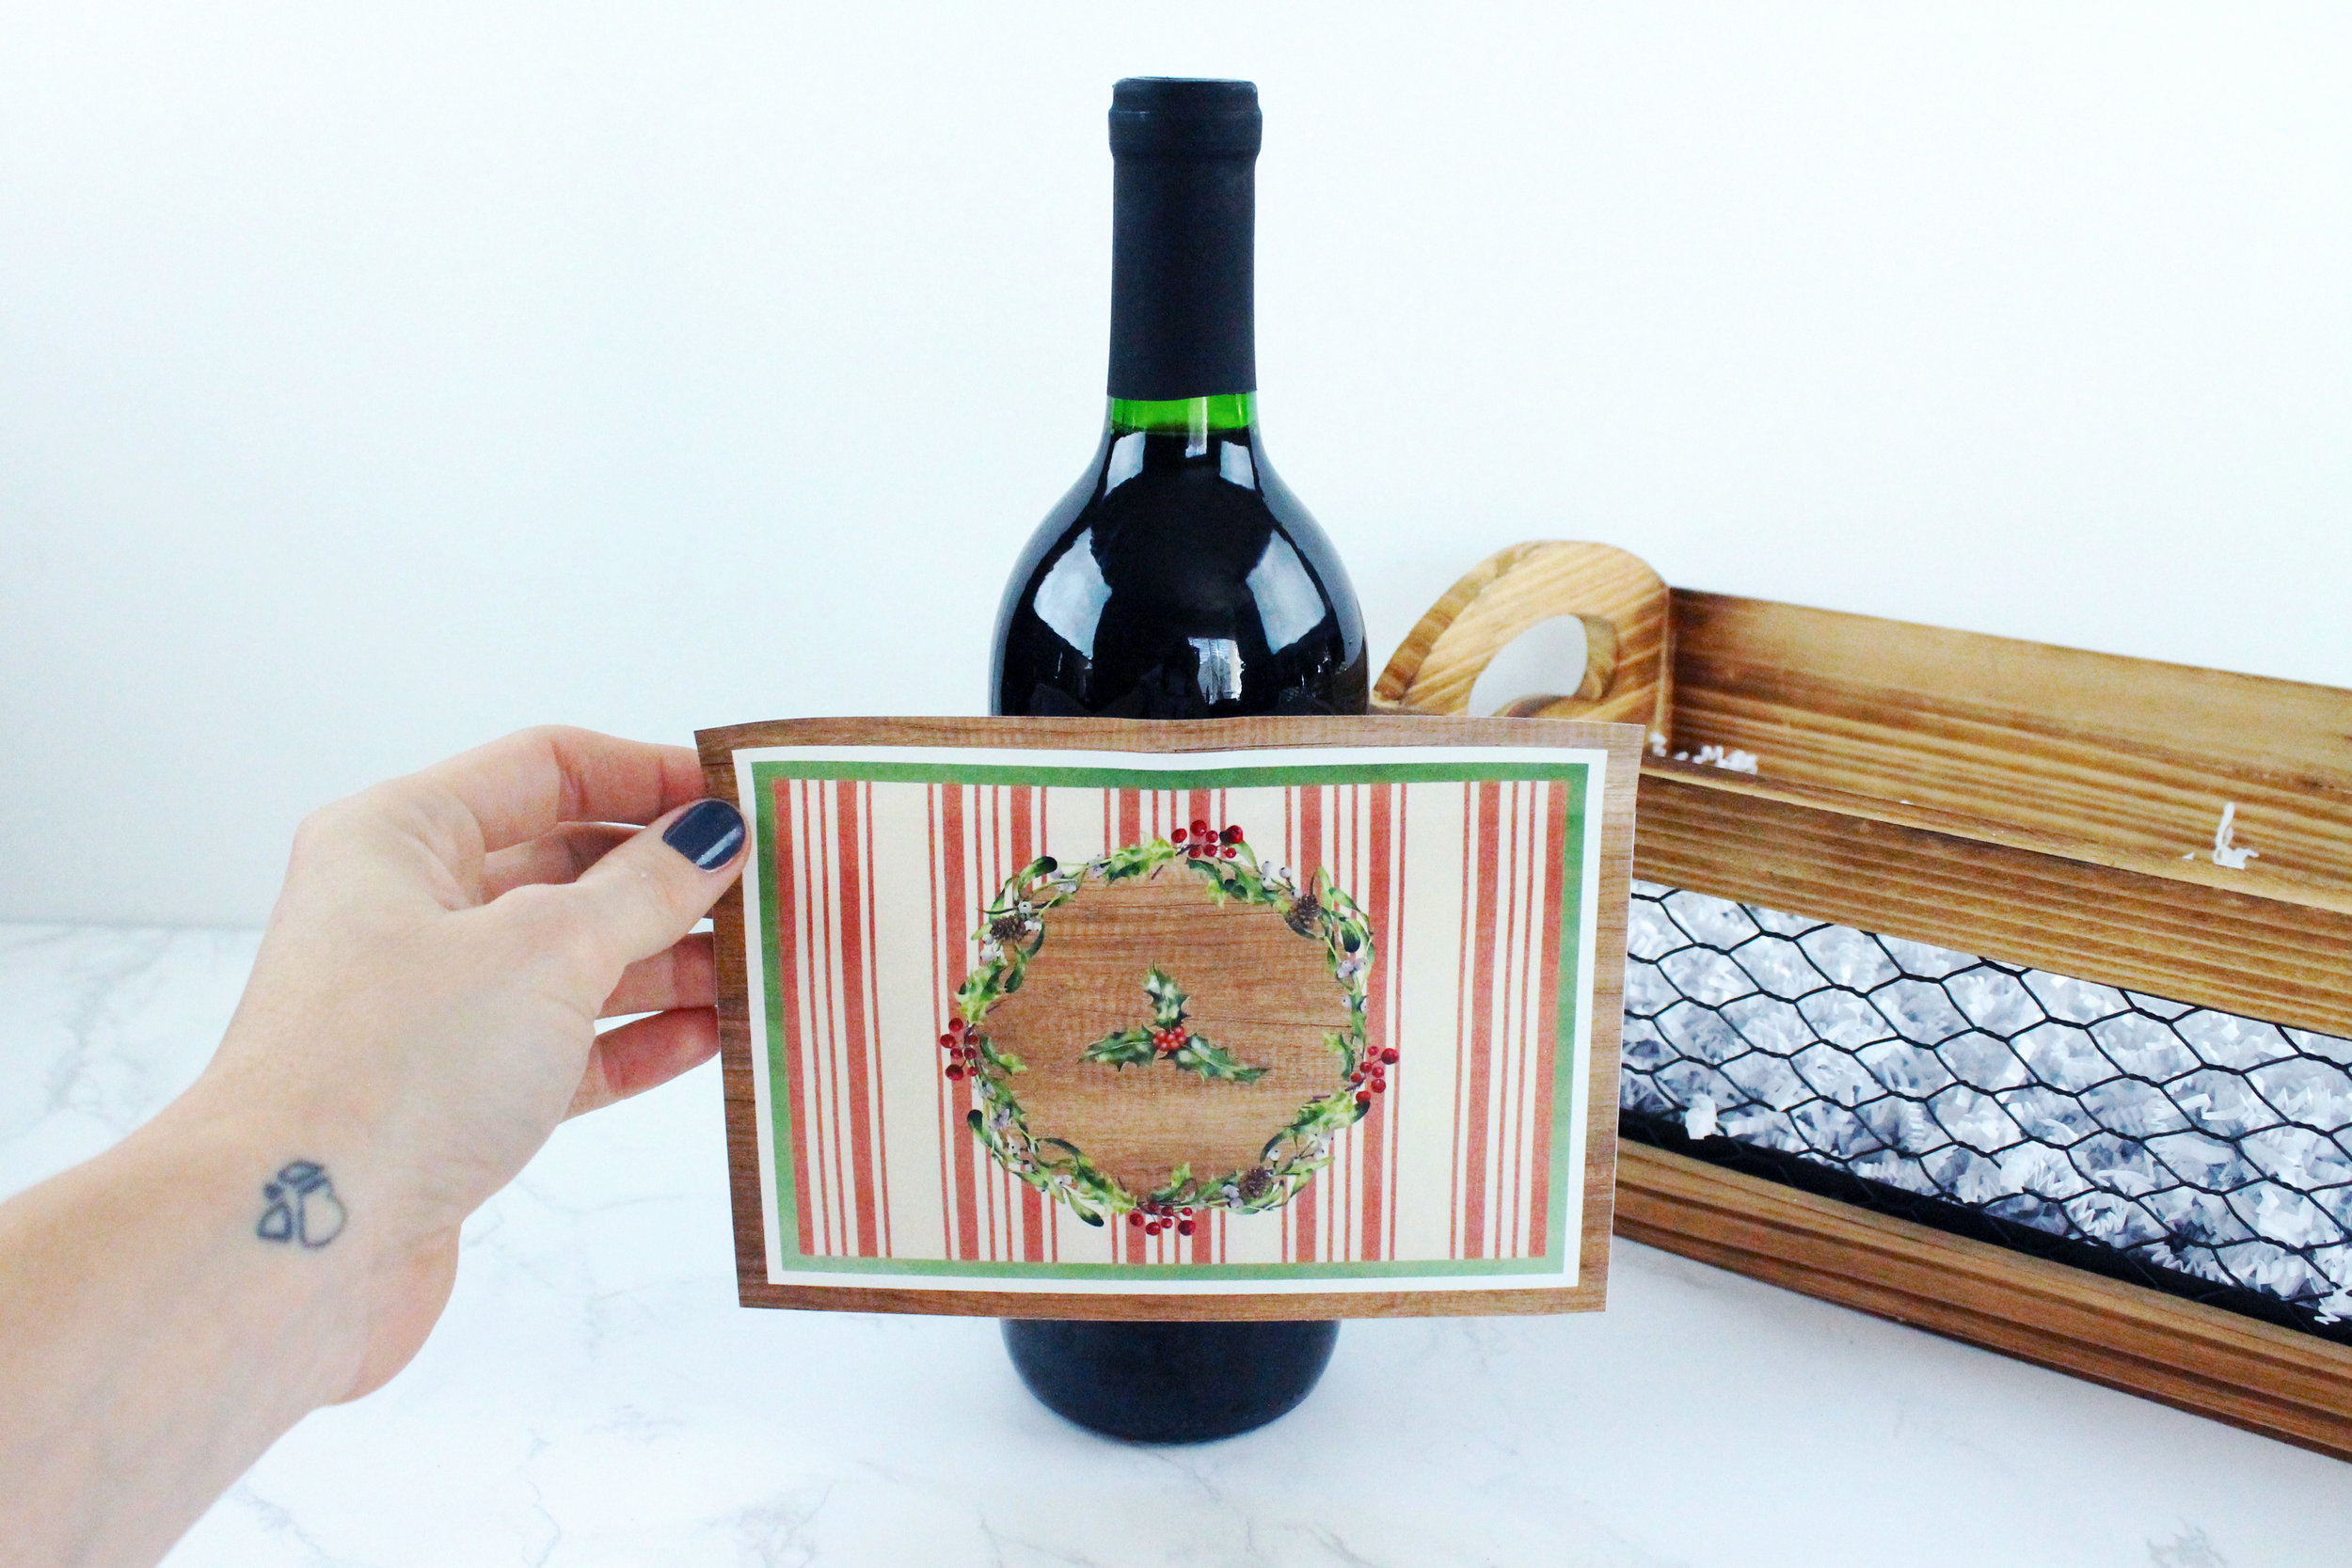
Begin by removing the narrowest piece from the crack-and-peel sticker backing. Then place your sticker centered on the front of the wine bottle.
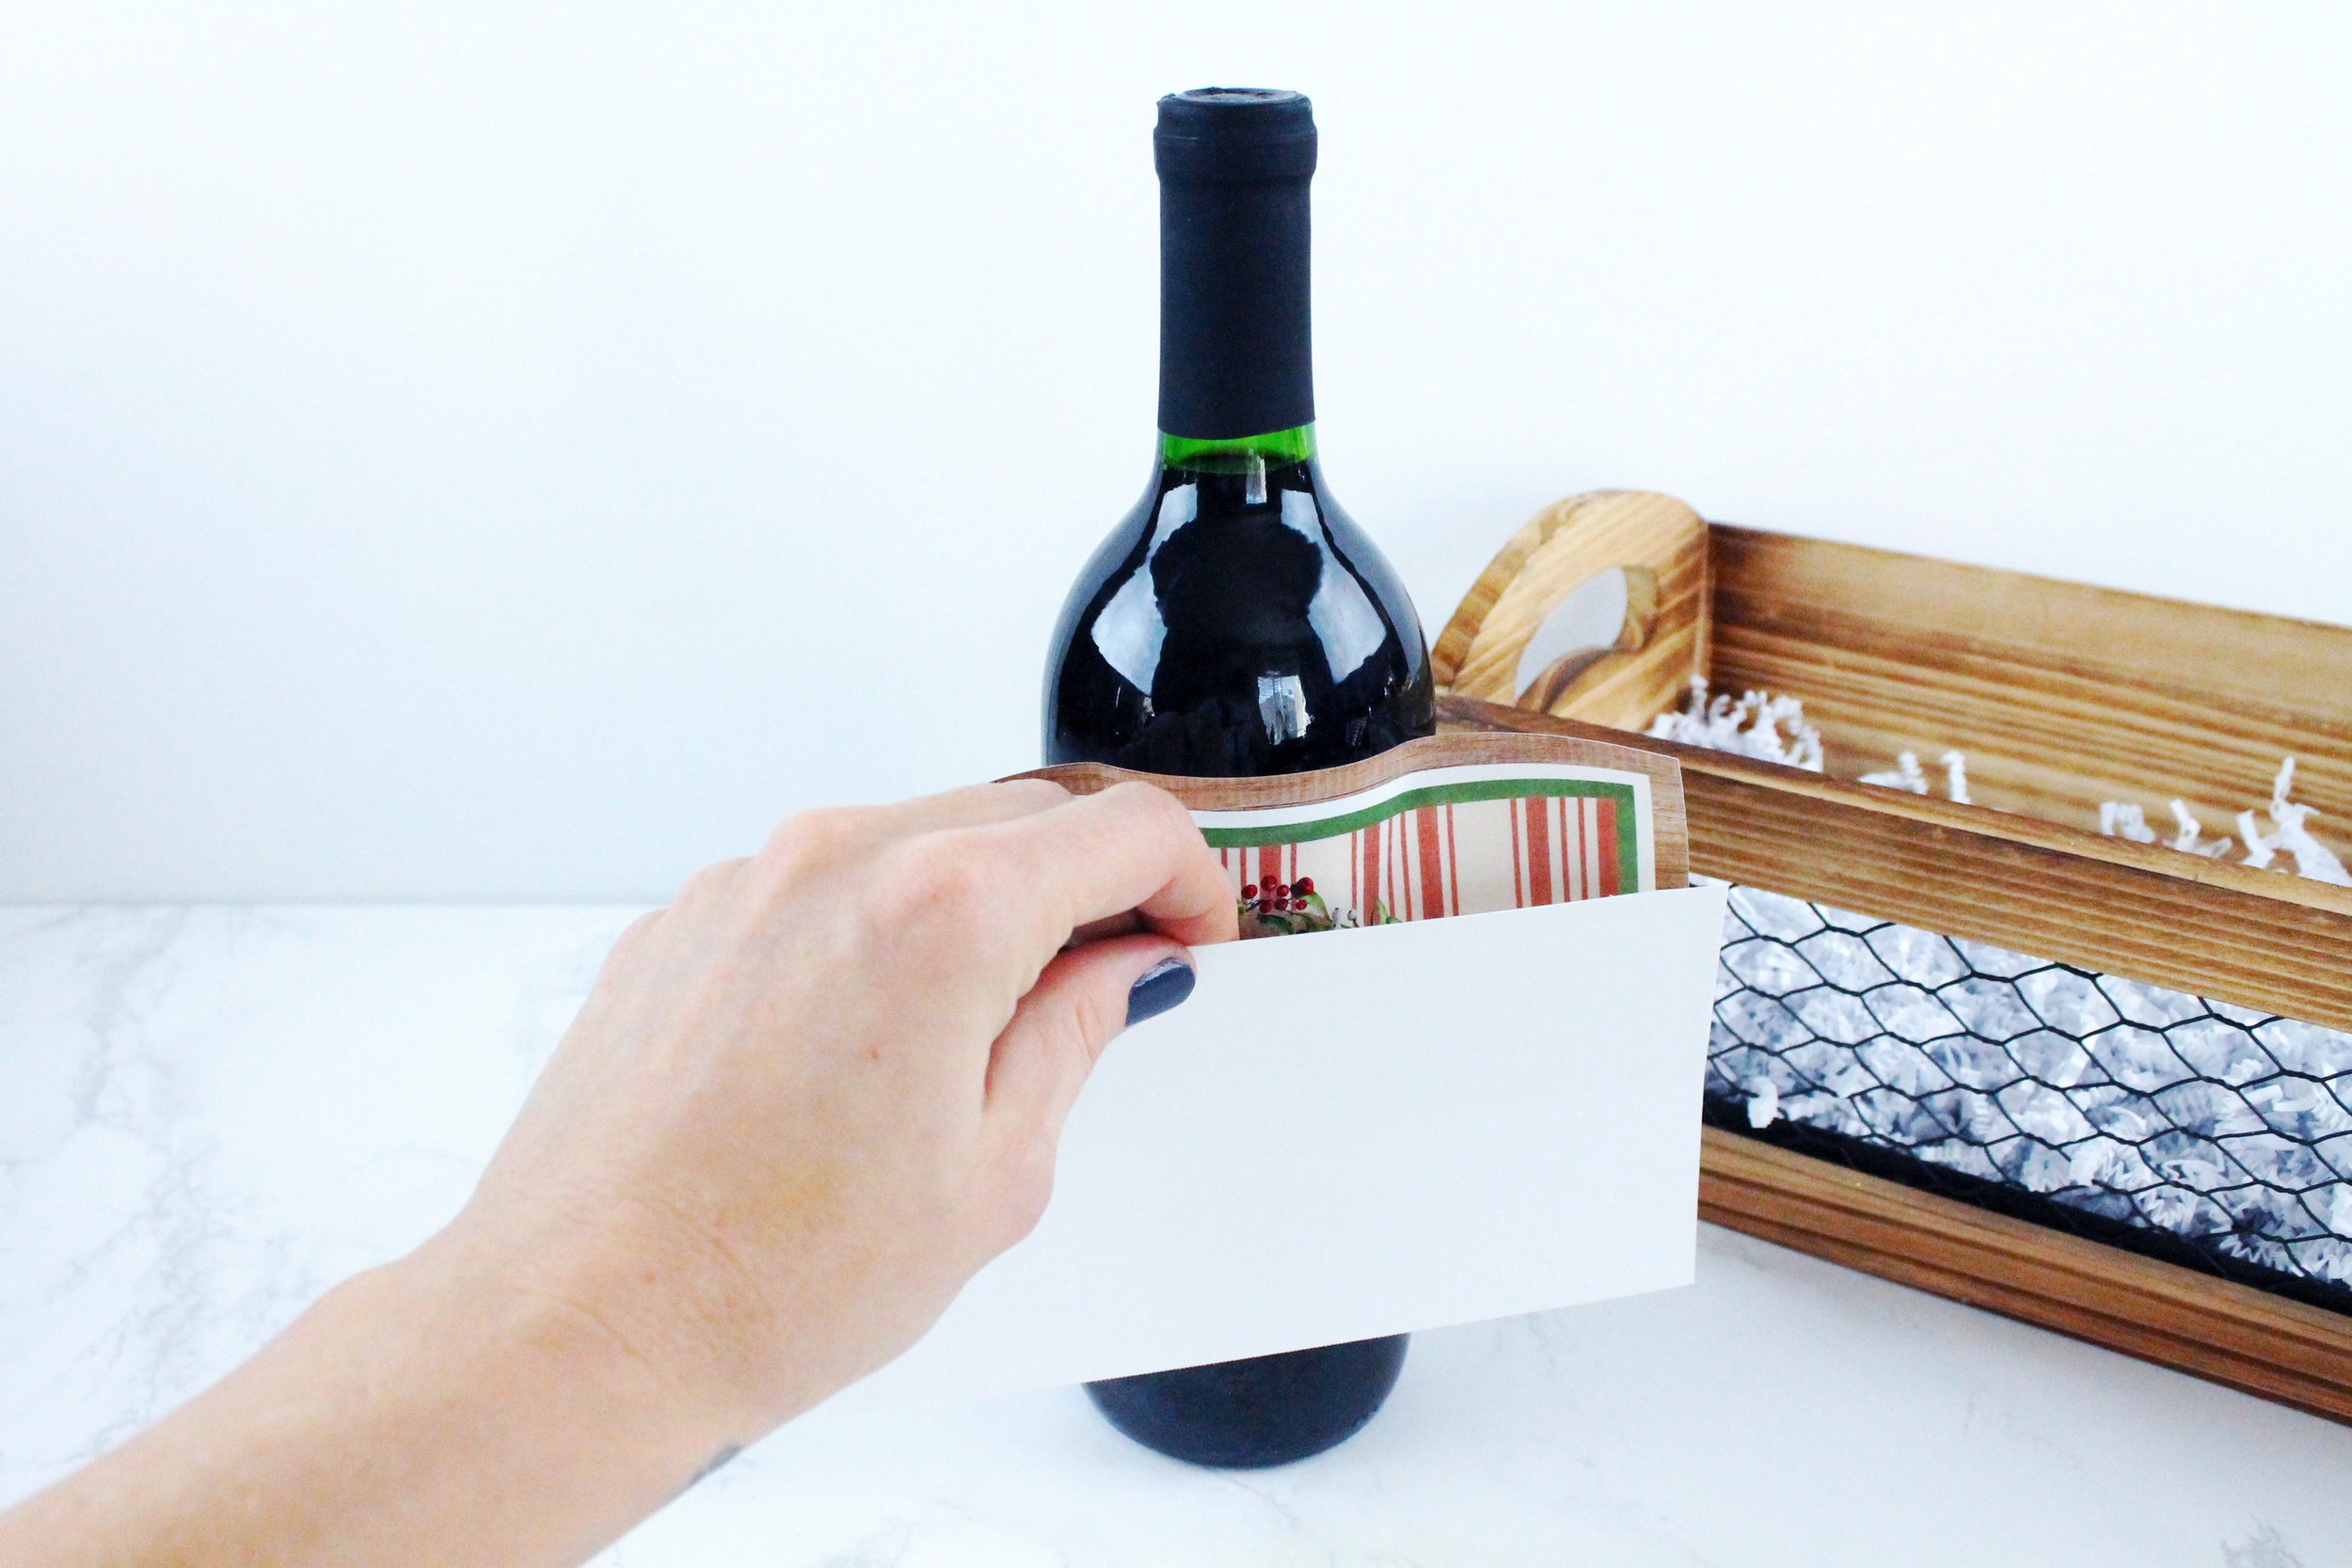
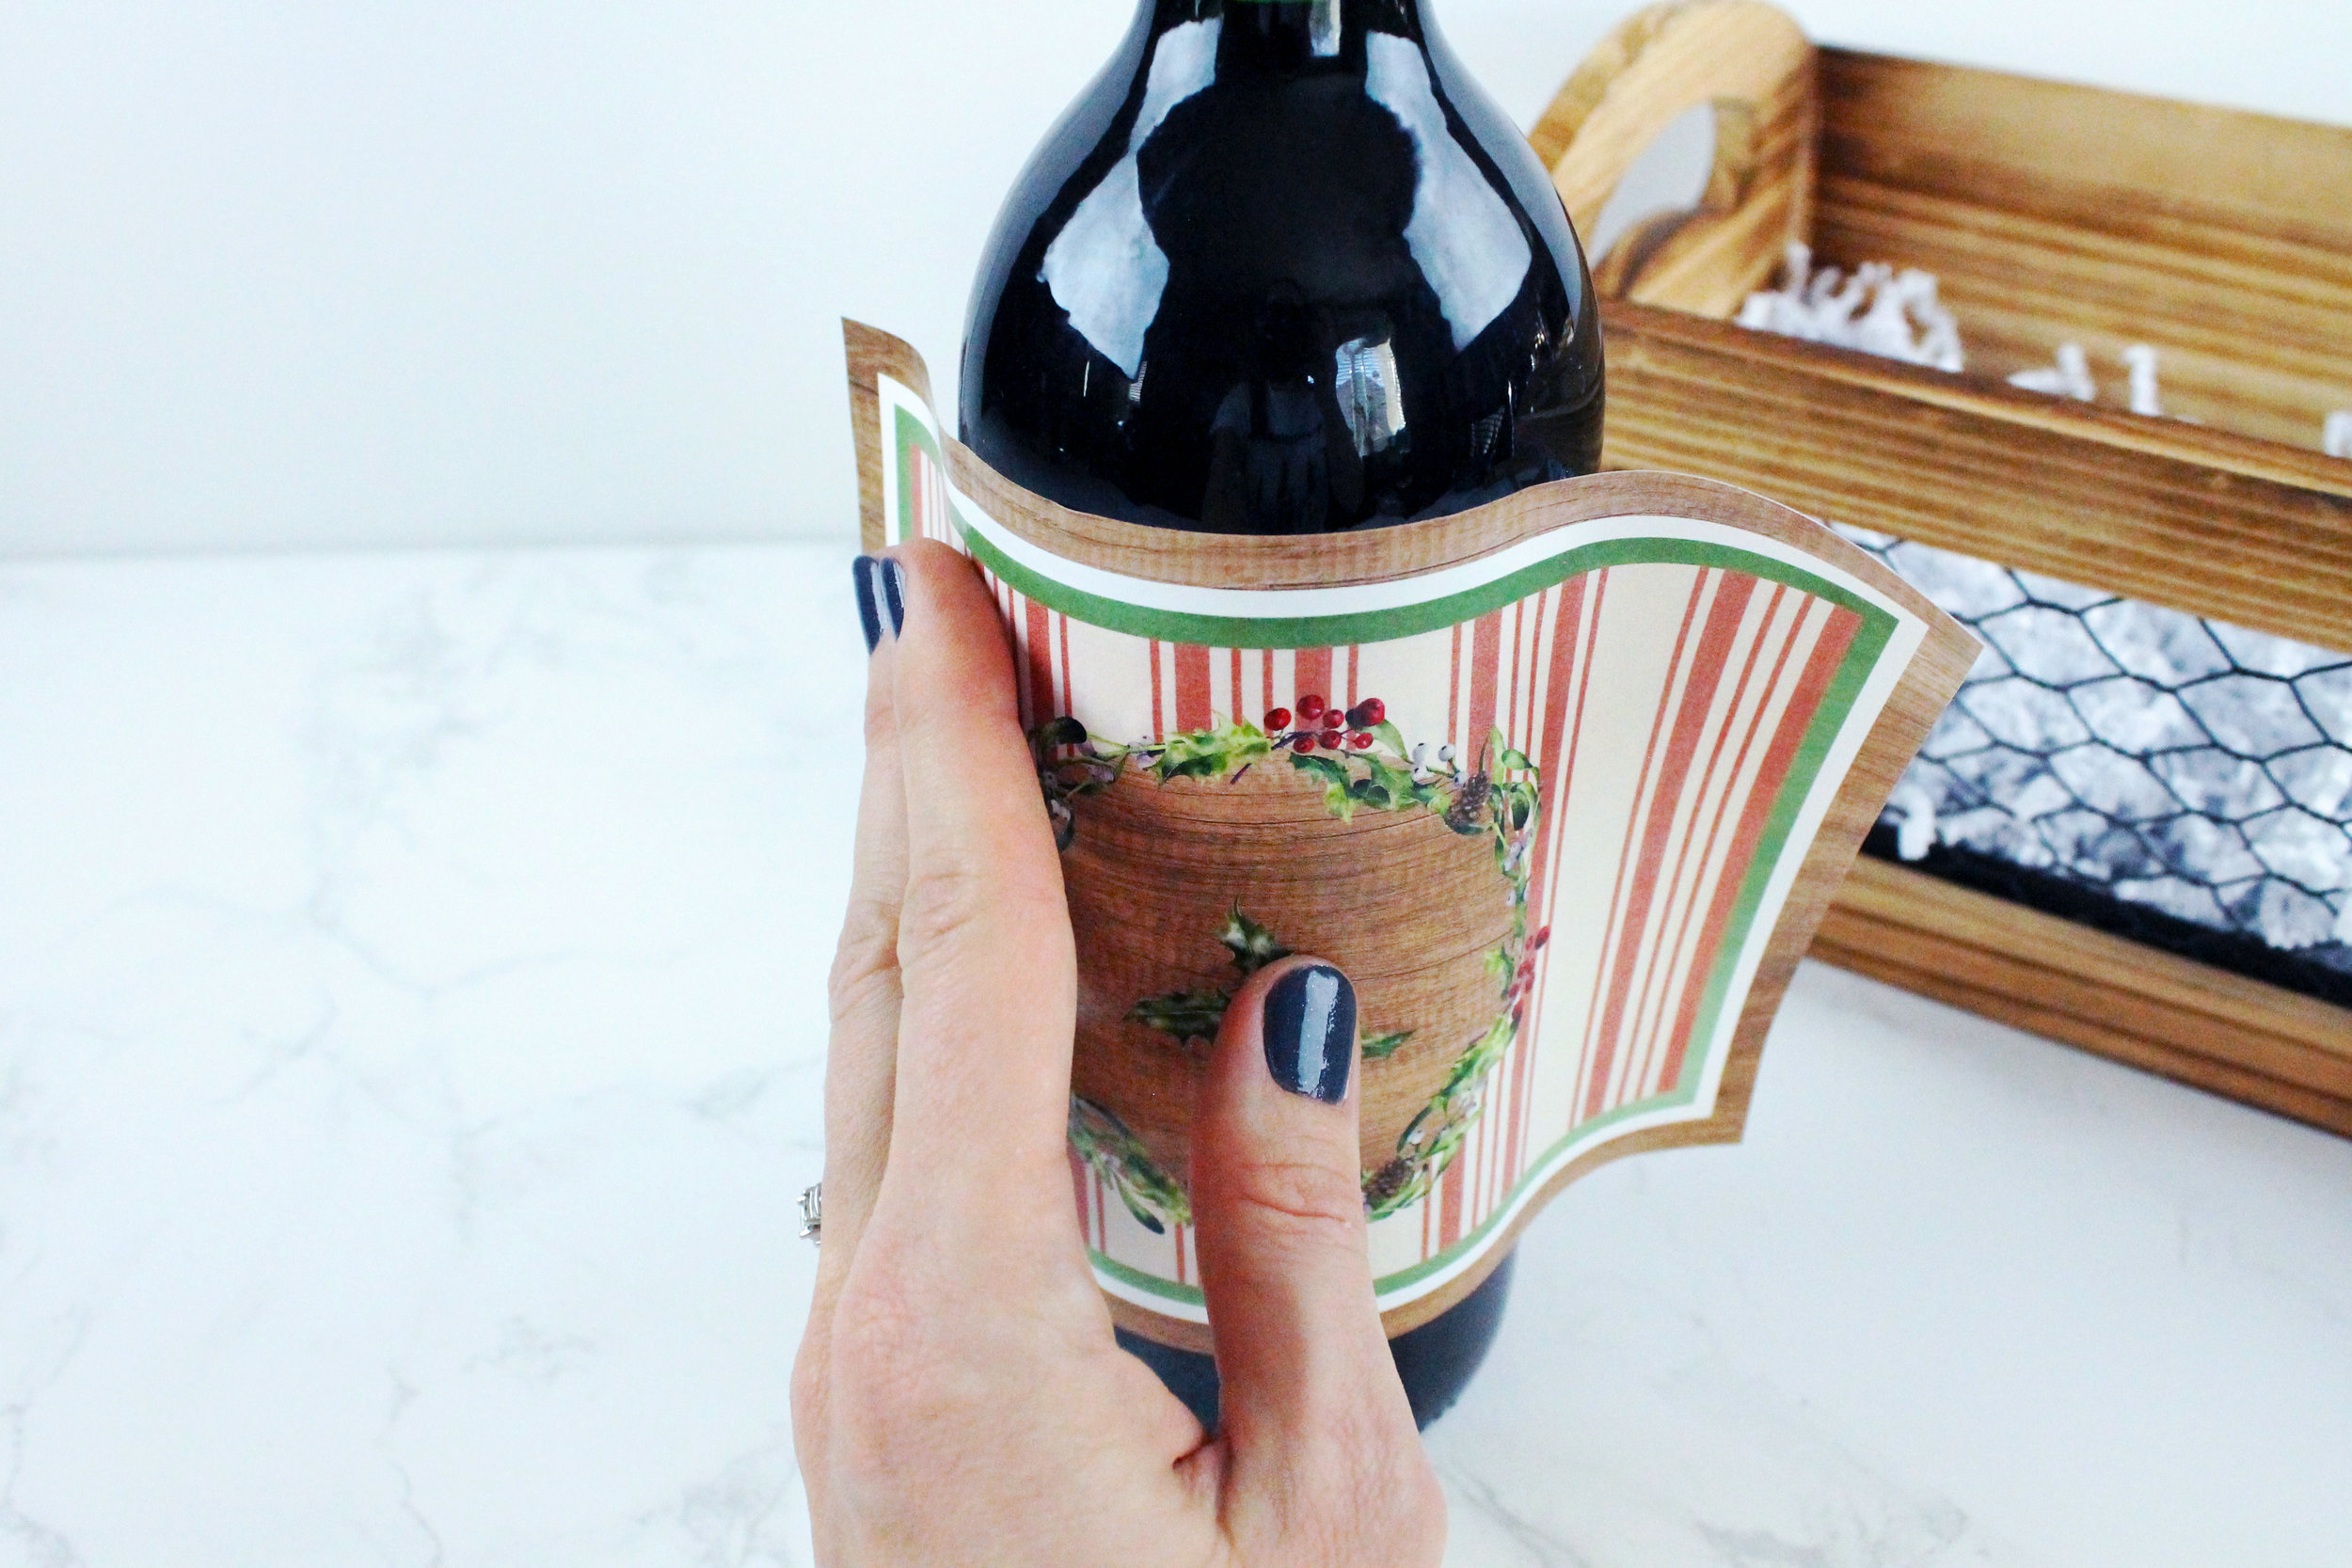
When satisfied with the alignment, press down the narrow, exposed part of the sticker to secure the placement. Then remove the remainder of the sticker backing while rolling the sticker onto the bottle. Finally, secure the sticker around the sides of the bottle by pressing down beginning at the center of the sticker, outward towards either end.

STEP 3

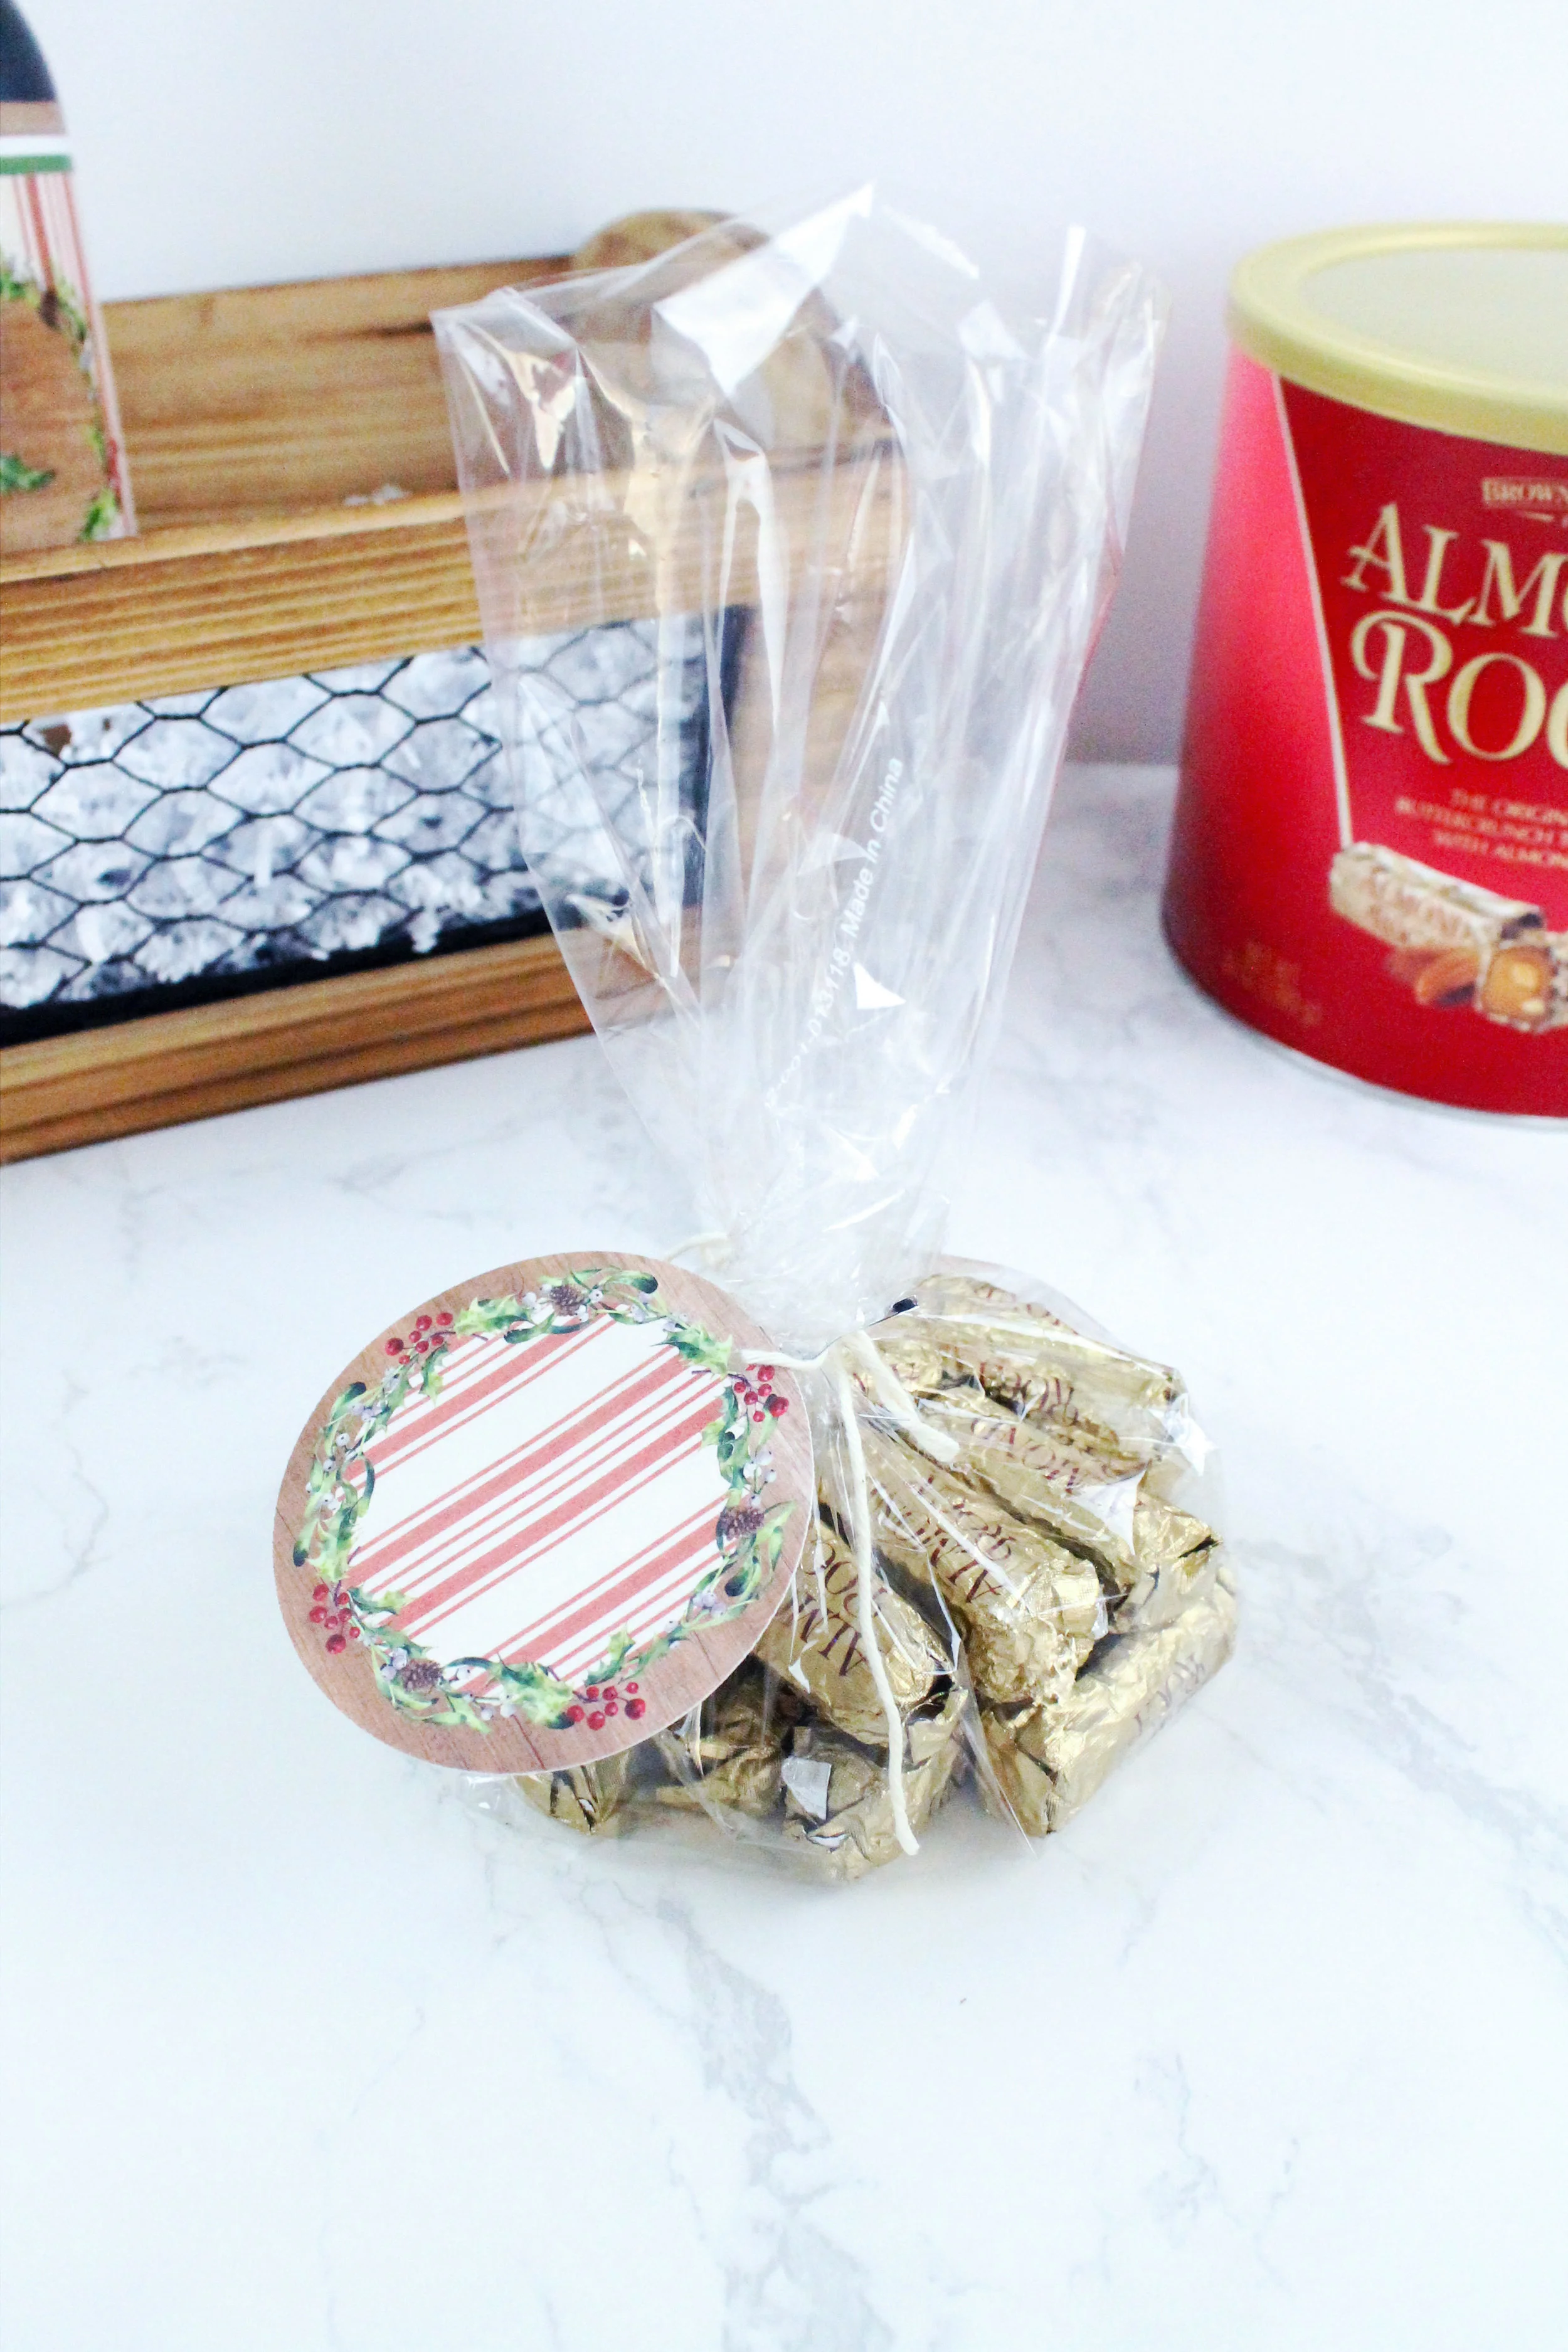

Place 12-16 pieces of Almond Roca into one of your clear treat bags. Then Secure it closed with a gift tag and piece of string from the Rustic Christmas Gift Wrap Kit! Now it’s time to add all of our goodies into the gift basket
STEP 4

Fill out one of the coordinating greeting cards from the Rustic Christmas Gift Wrap Kit then seal it in the included envelope, finally placing it into the basket with the gifts.
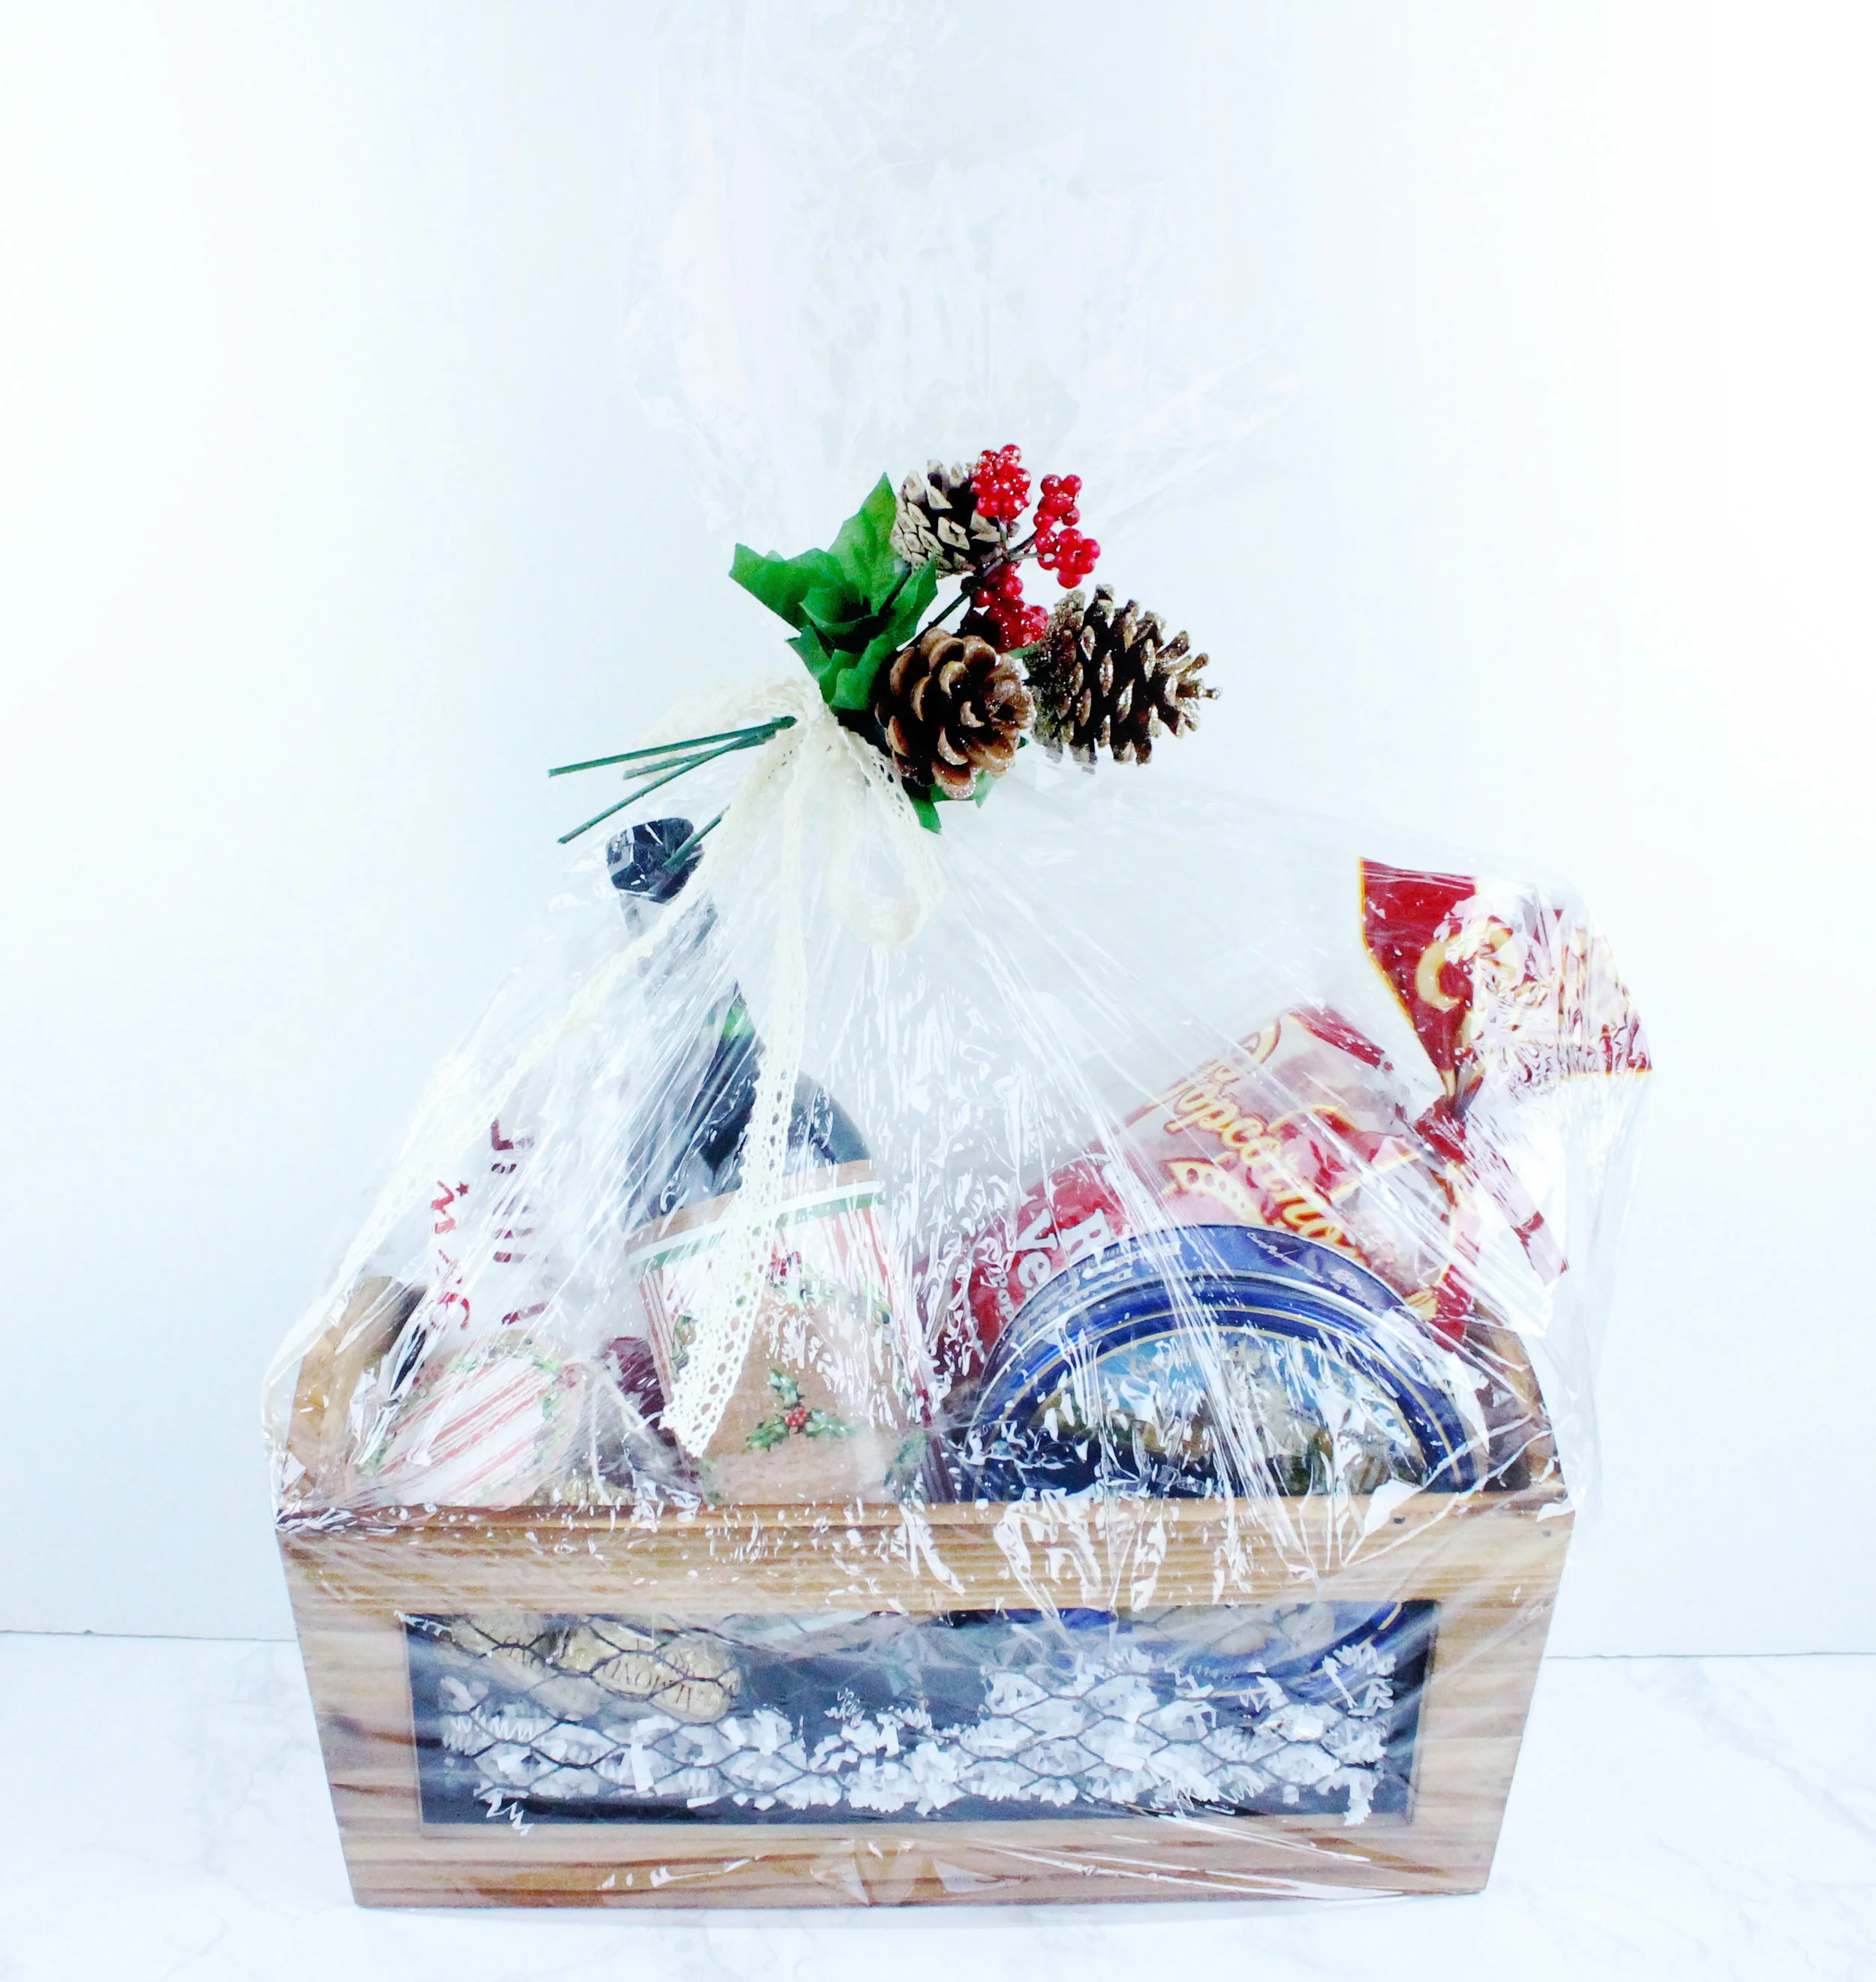
STEP 5

Once your gift basket items are arranged the way you like them, place the entire basked into the Gift Basket Shrink Wrap bag. Then secure the top closed with the lace ribbon, adding the pinecone & holly stem as additional decoration.

Use wire cutters to trim the wire floral stems to your desired length.
STEP 6

Use a hairdryer on a low setting to shrink the plastic securely against your items to hold everything in place. Be sure to follow the specific instructions and safety measures mentioned on the shrink wrap packaging.
READY TO GIFT!

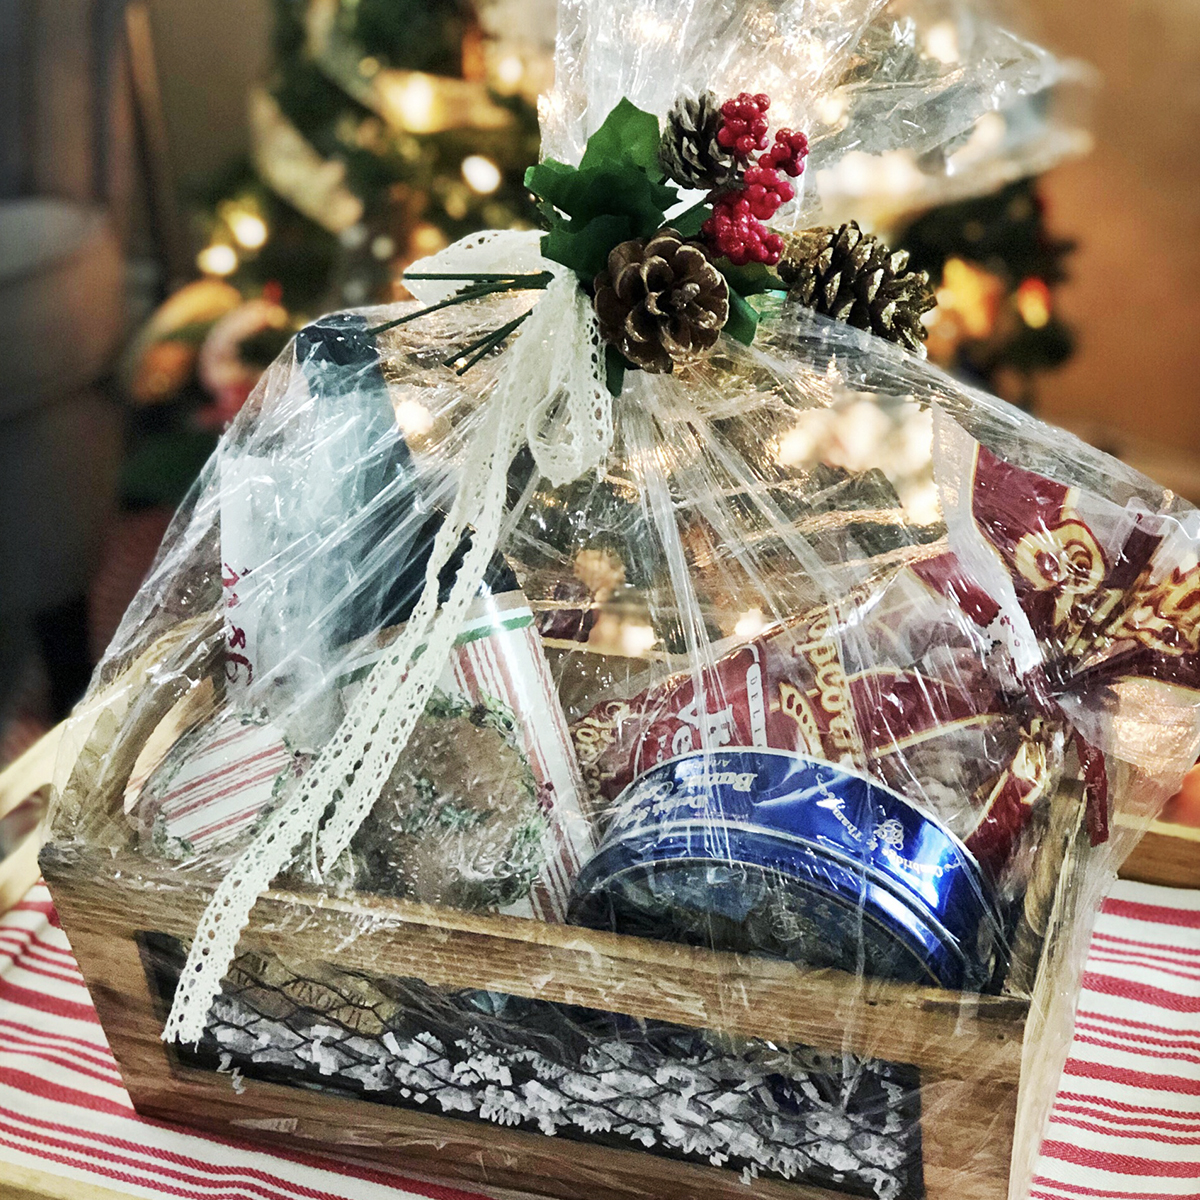
Your Gift Basket is officially ready to place under your tree or give to loved one! We hope you find this to be a helpful way to make a big impression on a frugal budget this Holiday Season! Let us know what you think of this tutorial in the comments below!
Learn how to put this beautiful gift basket of tasty treats together for under $20!